Exploring Flutter Bloc: Concepts, Benefits, And Architecture
Exploring Flutter Bloc: Concepts, Benefits, And Architecture
Discover The Power Of Flutter Bloc Architecture. Learn About Its Core Concepts, Benefits, And Architecture Components. Build Scalable And Maintainable Flutter Apps With Ease.
Technology
June 30, 2022
Pritimoy Biswas
Pritimoy is a passionate Android and Flutter developer with a knack for creating seamless and innovative mobile applications. Adept at crafting user-friendly interfaces and harnessing the power of open-source technologies. Experienced in building cross-platform solutions and dedicated to staying on the cutting edge of mobile development.
Good architecture is very important in every good building as well as a good application. When building an application without proper architecture you will end up in a state where everything is messed up. If you don’t follow a proper architecture for your application you will lose control of your application like maintainability, test-ability, and scalability. In this guide, we will talk about Blocs. Bloc is not just a state management system, it’s also an architectural design pattern that helps you to build production-level applications.
What is Flutter Bloc?
Good architecture is very important in every good building as well as a good application. When building an application without proper architecture you will end up in a state where everything is messed up. If you don’t follow a proper architecture for your application you will lose control of your application like maintainability, test-ability, and scalability. In this guide, we will talk about Blocs. Bloc is not just a state management system, it’s also an architectural design pattern that helps you to build production-level applications.
Why Flutter Bloc?
There are many state management solutions and deciding which one to use can be a daunting task. There is no one perfect state management solution! What’s important is that you pick the one that works best for your team and your project.
- It is easy to learn and use. The Flutter Bloc documentation is clear and concise and there are many tutorials available online.
- It is powerful and scalable. Flutter Bloc can handle complex applications with a large number of states.
- It is reactive. Flutter Bloc updates the state of the application automatically in response to events.
- It is well-tested and maintained. The Flutter Bloc team is committed to providing a stable and reliable library.
Flutter Bloc Architecture
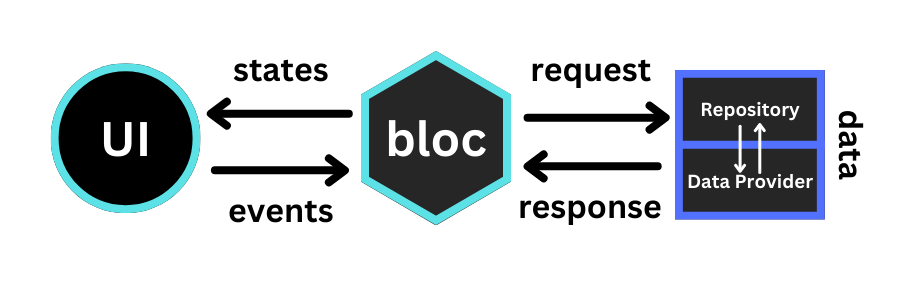
Using the bloc library allows us to separate our application into three layers:
- Presentation
- Business Logic
- Data
- Repository
- Data Provider
UI (Presentation)
The presentation layer in Flutter is the layer that is responsible for rendering the UI and responding to user input. It is the layer that is closest to the user and is responsible for making the app look and feel good.
The presentation layer is made up of widgets, which are small, reusable components that can be combined to create complex interfaces. Widgets are responsible for drawing themselves on the screen and responding to user input.
Bloc (Business Logic Layer)
The business logic layer is the bridge between the user interface (presentation layer) and the data layer. The business logic layer is notified of events/actions from the presentation layer and then communicates with the repository to build a new state for the presentation layer to consume.
class BusinessLogicComponent extends Bloc < MyEvent, MyState > {
    BusinessLogicComponent(this.repository) {
        on((event, emit) {
            try {
                final data = await repository.getAllDataThatMeetsRequirements();
                emit(Success(data));
            } catch (error) {
                emit(Failure(error));
            }
        });
    }
    final Repository repository;
}
Data Layer
This layer is the lowest level of the application and interacts with databases, network requests, and other asynchronous data sources.
The data layer can be split into two parts:
- Data Provider
- Repository
In-memory Data Providers
These providers store data in memory. They are easy to use and fast, but they can only store a limited amount of data.
File Data Providers
These providers store data in files. They can store a large amount of data, but they are not as fast as in-memory providers.
Database Data Providers
These providers store data in a database. They can store a very large amount of data and are very fast, but they can be more complex to use than other types of providers.
Web Service Data Providers
These providers fetch data from an external web service. They are easy to use and can be used to fetch data from any web service, but they can be slower than other types of providers.
class DataProvider {
    Future readData() async { // Read from DB or make network request etc. }
    }
Repository
This layer contains one or more than one Data Providers. Actually, the repository layer is a wrapper around one or more data providers with which the Bloc Layer communicates.
class Repository {
    final DataProviderA dataProviderA;
    final DataProviderB dataProviderB;
    Future getAllDataThatMeetsRequirements() async {
        final RawDataA dataSetA = await dataProviderA.readData();
        final RawDataB dataSetB = await dataProviderB.readData();
        final Data filteredData = _filterData(dataSetA, dataSetB);
        return filteredData;
    }
}
Core Concepts of Flutter Bloc:
Streams
A stream is a sequence of data elements that are continuously generated or received over time.If you’re unfamiliar with Streams just think of a pipe with water flowing through it. The pipe is the Stream and the water is the asynchronous data.
Events
Events are often used to trigger actions in a computer program. For example, when a user clicks a button in UI, an event is generated. This event can then be used to call a function or to change the state of the program.
State
The state is updated whenever an event is dispatched. The BLoC then emits the new state to all of its subscribers. This allows the subscribers to update their UI in response to changes in the state of the application.
Let’s Start with Coding
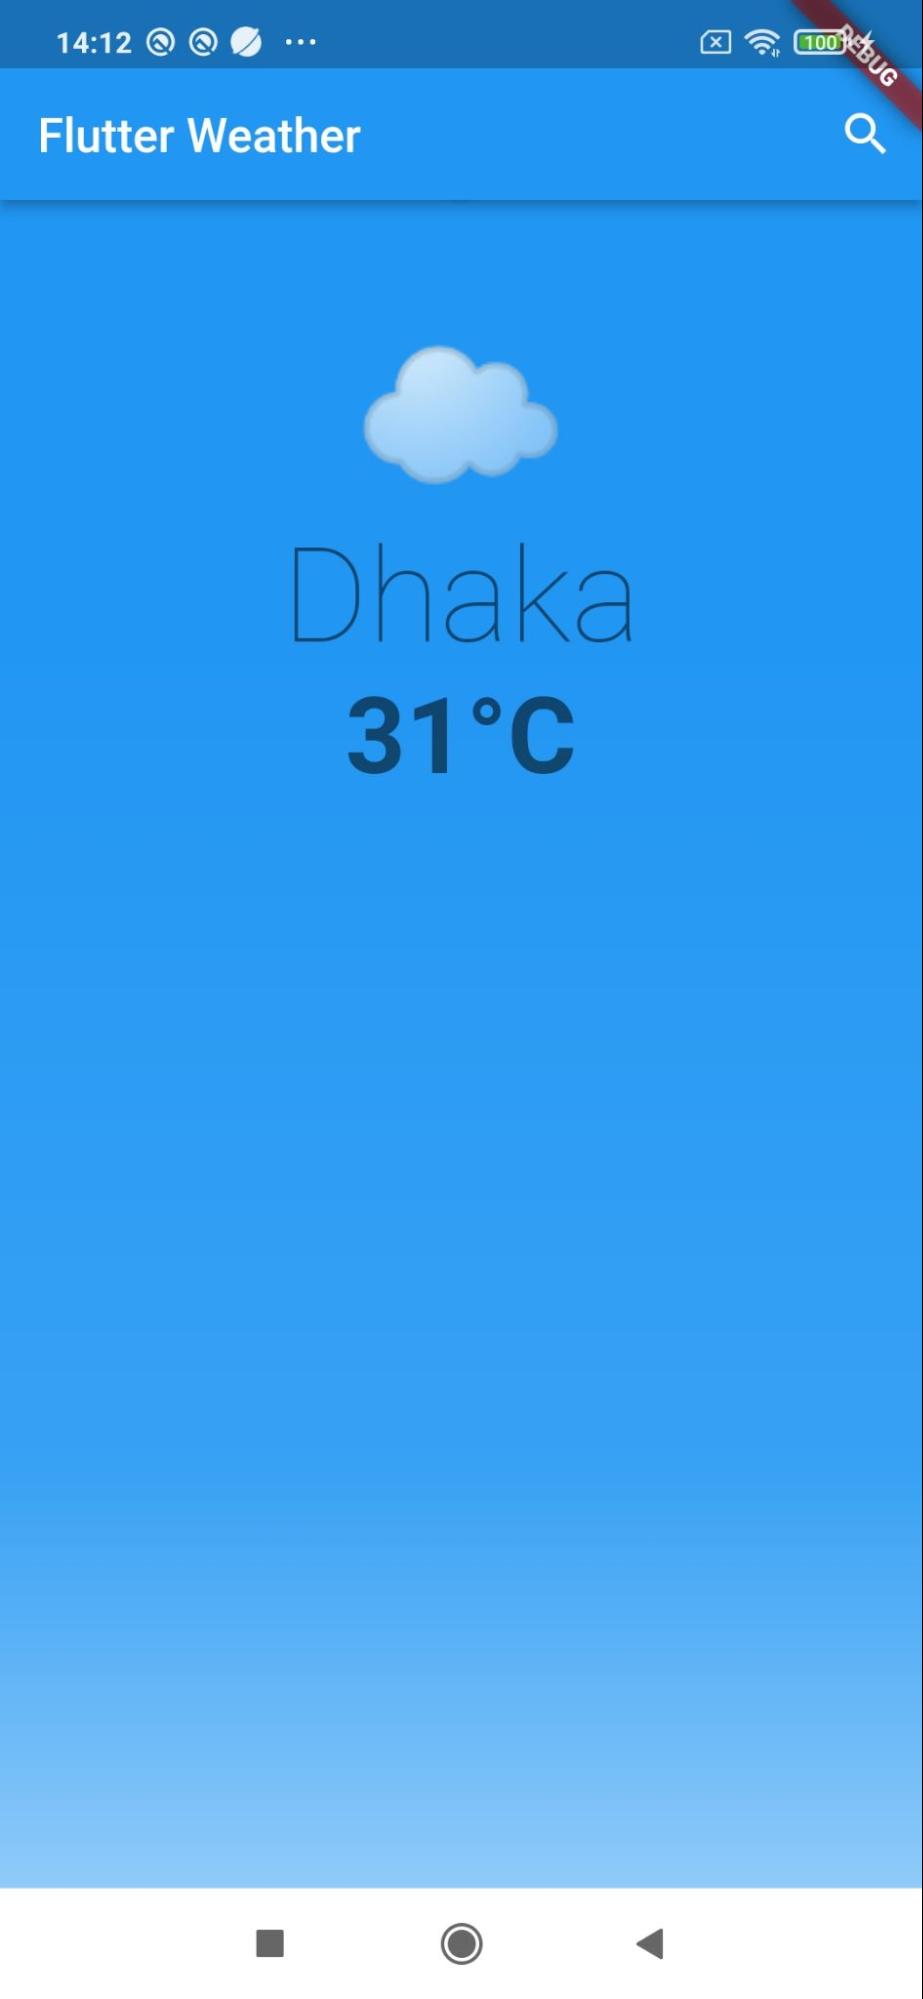
Project Overview
In this tutorial, we are going to build a weather application (following) flutter bloc. Our weather app will pull live weather data from the public OpenMeteo API and demonstrate how to separate our application into layers (data, repository, business logic, and presentation).
Step 1: Create a Flutter Project
Open the terminal and write the command
flutter create weather_flutterStep 2: Package We are using
Go to pubspec.yaml and add flutter_bloc, bloc, http, equatable,hydrated_bloc, and path_provider packages inside dependencies. Equatable overrides == and hashCode for you so you don’t have to waste your time writing lots of boilerplate code.
flutter_bloc: ^ 8.1 .3
http: ^ 0.13 .5
equatable: ^ 2.0 .5
Step 3: Project Setup
main.dart
void main() async {
    WidgetsFlutterBinding.ensureInitialized();
    runApp(WeatherApp(weatherRepository: WeatherRepositoryImpl(), ), );
}
app.dart
class WeatherApp extends StatelessWidget {
    final WeatherRepositoryImpl _weatherRepository;
    const WeatherApp({
        required WeatherRepositoryImpl weatherRepository,
        super.key
    }): _weatherRepository = weatherRepository;
    @override
    Widget build(BuildContext context) {
        return RepositoryProvider.value(value: _weatherRepository, child: const WeatherAppView(), );
    }
}
class WeatherAppView extends StatelessWidget {
    const WeatherAppView({
        super.key
    });
    @override
    Widget build(BuildContext context) {
        final textTheme = Theme.of(context).textTheme;
        return const MaterialApp(home: WeatherScreen(), );
    }
}
weather_screen.dart
class WeatherScreen extends StatelessWidget {
const WeatherScreen({
Key ? key
}): super(key: key);
@override
Widget build(BuildContext context) {
return BlocProvider(create: (context) => WeatherBloc(context.read()), child: const WeatherView(), );
}
}
class WeatherView extends StatefulWidget {
const WeatherView({
Key ? key
}): super(key: key);
@override
State createState() => _WeatherViewState();
}
class _WeatherViewState extends State {
Future getRefresh() async {}
@override
Widget build(BuildContext context) {
return Scaffold(appBar: AppBar(title: const Text('Flutter Weather'),
actions: [
IconButton(icon: const Icon(Icons.search),
onPressed: () async {
var result = await Navigator.of(context).push(SearchScreen.route(), );
if (result != null && mounted) {
context.read().add(GetWeather(city: result));
}
}, ),
], ), body: SafeArea(child: Center(child: BlocConsumer < WeatherBloc, WeatherState > (listener: (context, state) {}, builder: (context, state) {
switch (state.status) {
case Status.initial:
return const WeatherEmpty();
case Status.failed:
return const WeatherError();
case Status.loading:
return const WeatherLoading();
case Status.success:
return WeatherPopulated(weather: state.weather!, units: state.temperatureUnits, onRefresh: () {
return getRefresh();
}, );
}
}, ), ), ), );
}
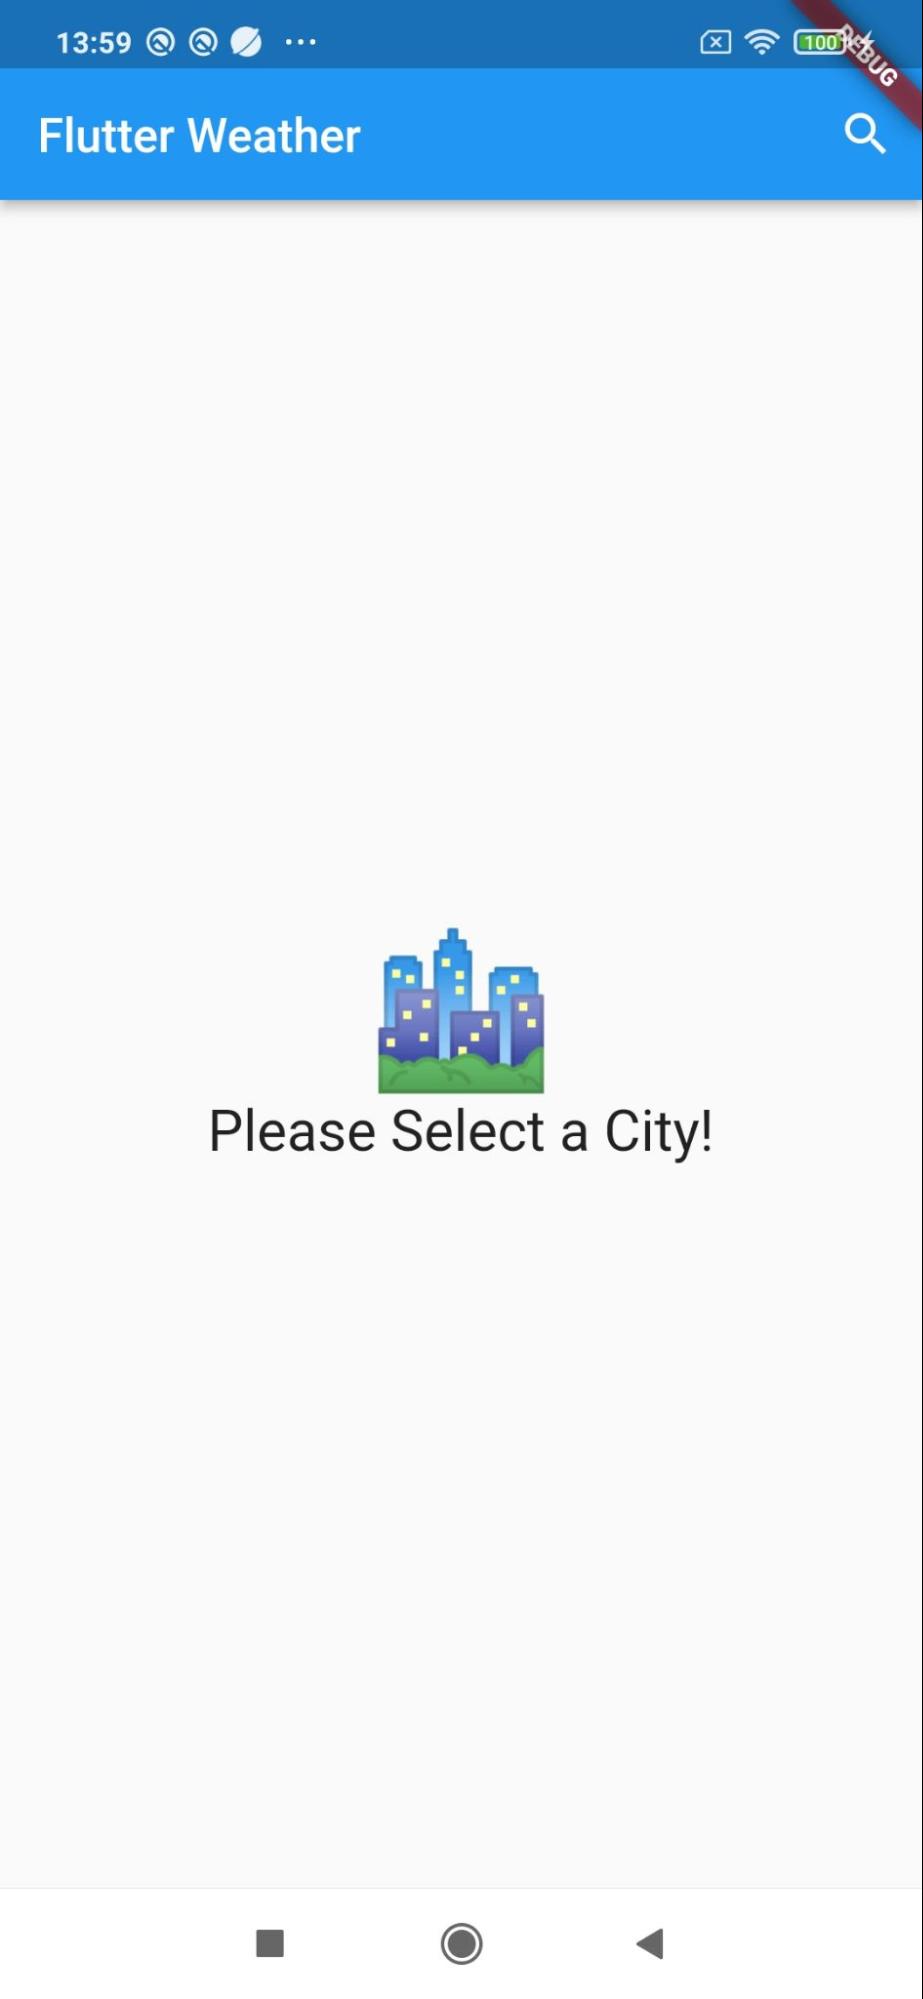
}WeatherEmpty
class WeatherEmpty extends StatelessWidget {
    const WeatherEmpty({
        super.key
    });
    @override
    Widget build(BuildContext context) {
        final theme = Theme.of(context);
        return Column(mainAxisSize: MainAxisSize.min, children: [
            const Text('Cityscape Emoji', style: TextStyle(fontSize: 64)),
                Text('Please Select a City!', style: theme.textTheme.headlineSmall, ),
        ], );
    }
}
WeatherError
class WeatherError extends StatelessWidget {
    const WeatherError({
        super.key
    });
    @override
    Widget build(BuildContext context) {
        final theme = Theme.of(context);
        return Column(mainAxisSize: MainAxisSize.min, children: [
            const Text('See No Evil Monkey Emoji', style: TextStyle(fontSize: 64)),
                Text('Something went wrong!', style: theme.textTheme.headlineSmall, ),
        ], );
    }
}
WeatherLoading
class WeatherLoading extends StatelessWidget {
    const WeatherLoading({
        super.key
    });
    @override
    Widget build(BuildContext context) {
        final theme = Theme.of(context);
        return Column(mainAxisSize: MainAxisSize.min, children: [
            const Text('⛅', style: TextStyle(fontSize: 64)),
                Text('Loading Weather', style: theme.textTheme.headlineSmall, ),
                const Padding(padding: EdgeInsets.all(16), child: CircularProgressIndicator(), ),
        ], );
    }
}
weather_populated.dart
class WeatherPopulated extends StatelessWidget {
    const WeatherPopulated({
        required this.weather,
        required this.units,
        required this.onRefresh,
        super.key,
    });
    final Weather weather;
    final TemperatureUnits units;
    final ValueGetter < Future < void >> onRefresh;
    // final Function<void> onRefresh;
    @override
    Widget build(BuildContext context) {
        final theme = Theme.of(context);
        return Stack(children: [
            _WeatherBackground(),
            RefreshIndicator(onRefresh: onRefresh, child: SingleChildScrollView(physics: const AlwaysScrollableScrollPhysics(),
                clipBehavior: Clip.none,
                child: Center(child: Column(children: [
                    const SizedBox(height: 48),
                        _WeatherIcon(condition: weather.condition),
                        Text(weather.location, style: theme.textTheme.displayMedium?.copyWith(fontWeight: FontWeight.w200, ), ),
                        Text(weather.formattedTemperature(units), style: theme.textTheme.displaySmall?.copyWith(fontWeight: FontWeight.bold, ), ),
                    // Text(
                    // '''Last Updated at ${TimeOfDay.fromDateTime(weather.).format(context)}''',
                    // ),
                ], ), ), ), ),
        ], );
    }
}
class _WeatherIcon extends StatelessWidget {
    const _WeatherIcon({
        required this.condition
    });
    static
    const _iconSize = 75.0;
    final WeatherCondition condition;
    @override
    Widget build(BuildContext context) {
        return Text(condition.toEmoji, style: const TextStyle(fontSize: _iconSize), );
    }
}
extension on WeatherCondition {
    String get toEmoji {
        switch (this) {
            case WeatherCondition.clear:
                return 'Sun Emoji';
            case WeatherCondition.rainy:
                return 'Rainy Cloud Emoji';
            case WeatherCondition.cloudy:
                return 'Cloud Emoni';
            case WeatherCondition.snowy:
                return 'Cloud with Snow ';
            case WeatherCondition.unknown:
                return '❓';
        }
    }
}
class _WeatherBackground extends StatelessWidget {
    @override
    Widget build(BuildContext context) {
        final color = Theme.of(context).primaryColor;
        return SizedBox.expand(child: DecoratedBox(decoration: BoxDecoration(gradient: LinearGradient(begin: Alignment.topCenter, end: Alignment.bottomCenter, stops: const [0.25, 0.75, 0.90, 1.0], colors: [
            color,
            color.brighten(),
            color.brighten(33),
            color.brighten(50),
        ], ), ), ), );
    }
}
extension on Color {
    Color brighten([int percent = 10]) {
        assert(1 <= percent && percent <= 100, 'percentage must be between 1 and 100', );
        final p = percent / 100;
        return Color.fromARGB(alpha, red + ((255 - red) * p).round(), green + ((255 - green) * p).round(), blue + ((255 - blue) * p).round(), );
    }
}
extension on Weather {
    String formattedTemperature(TemperatureUnits units) {
        return ''
        '${temperature.toStringAsPrecision(2)}°${units.isCelsius ? '
        C ' : '
        F '}'
        '';
    }
}
screen_search.dart
class SearchScreen extends StatefulWidget {
    const SearchScreen({
        Key ? key
    }): super(key: key);
    static Route < String > route() {
        return MaterialPageRoute(builder: (_) =>
            const SearchScreen());
    }
    @override
    State < SearchScreen > createState() => _SearchScreenState();
}
class _SearchScreenState extends State < SearchScreen > {
    final TextEditingController _textController = TextEditingController();
    String get _text => _textController.text;
    @override
    void dispose() {
        _textController.dispose();
        super.dispose();
    }
    @override
    Widget build(BuildContext context) {
        return Scaffold(appBar: AppBar(title: const Text('City Search')), body: Row(children: [
            Expanded(child: Padding(padding: const EdgeInsets.all(8),
                child: TextField(controller: _textController, decoration: const InputDecoration(labelText: 'City', hintText: 'Chicago', ), ), ), ),
            IconButton(key: const Key('searchPage_search_iconButton'),
                icon: const Icon(Icons.search, semanticLabel: 'Submit'),
                    onPressed: () => Navigator.of(context).pop(_text), )
        ], ), );
    }
}
Final UI:
Data Layer
Data: Retrieve raw weather data from the API
We’ll be focusing on two endpoints:
- https://geocoding-api.open-meteo.com/v1/search?name=$city&count=1 to get a location for a given city name
- https://api.open-meteo.com/v1/forecast?latitude=$latitude&longitude=$longitude¤t_weather=true to get the weather for a given location
Open https://geocoding-api.open-meteo.com/v1/search?name=chicago&count=1 in your browser to see the response for the city of Chicago. We will use the latitude and longitude in the response to hit the weather endpoint.
The latitude/longitude for Chicago is 41.85003/-87.65005. Navigate to https://api.open-meteo.com/v1/forecast?latitude=43.0389&longitude=-87.90647¤t_weather=true in your browser and you’ll see the response for weather in Chicago which contains all the data we will need for our app.
Repository Layer
The goal of our repository layer is to abstract our data layer and facilitate communication with the bloc layer. In doing this, the rest of our code base depends only on functions exposed by our repository layer instead of specific data provider implementations. This allows us to change data providers without disrupting any of the application-level code.
weather_repository.dart
Here we just declared the method
abstract class WeatherRepository {
    Future getWeather(String city);
}
Now Implement the WeatherRepository abstract class on weather_repository_impl
class WeatherRepositoryImpl extends WeatherRepository {
    final ApiClient _apiClient;
    WeatherRepositoryImpl({
        ApiClient ? apiClient
    }): _apiClient = apiClient ?? ApiClient();
    @override
    Future < Weather > getWeather(String city) async {
        final location = await _apiClient.locationSearch(city);
        final weather = await _apiClient.getWeather(latitude: location.locationData!.first.latitude!, longitude: location.locationData!.first.longitude!, );
        return Weather(temperature: weather.temperature!, location: location.locationData!.first.name!, condition: weather.weatherCode!.toInt().toCondition, );
    }
}
extension on int {
    WeatherCondition get toCondition {
        switch (this) {
            case 0:
                return WeatherCondition.clear;
            case 1:
            case 2:
            case 3:
            case 45:
            case 48:
                return WeatherCondition.cloudy;
            case 51:
            case 53:
            case 55:
            case 56:
            case 57:
            case 61:
            case 63:
            case 65:
            case 66:
            case 67:
            case 80:
            case 81:
            case 82:
            case 95:
            case 96:
            case 99:
                return WeatherCondition.rainy;
            case 71:
            case 73:
            case 75:
            case 77:
            case 85:
            case 86:
                return WeatherCondition.snowy;
            default:
                return WeatherCondition.unknown;
        }
    }
}
Model
CurrentWeather.dart
We are using three model current_weather.dart, location.dart and weather.dart
class CurrentWeather {
    double ? temperature;
    double ? windSpeed;
    String ? time;
    int ? weatherCode;
    CurrentWeather({
        this.temperature,
        this.windSpeed,
        this.time
    });
    CurrentWeather.fromJson(Map < String, dynamic > json) {
        temperature = json['temperature'];
        windSpeed = json['windspeed'];
        time = json['time'];
        weatherCode = json['weathercode'];
    }
}
Location.dart
class Location {
    List < LocationData > ? locationData;
    Location({
        this.locationData
    });
    Location.fromJson(Map < String, dynamic > json) {
            if (json['results'] != null) {
                locationData = <LocationData>[];
json['results'].forEach((v) {
locationData!.add(LocationData.fromJson(v));
});
}
}
}
class LocationData {
int? id;
String? name;
double? latitude;
double? longitude;
LocationData({this.id, this.name, this.latitude, this.longitude});
LocationData.fromJson(Map<String, dynamic> json) {
id = json['id'];
name = json['name'];
latitude = json['latitude'];
longitude = json['longitude'];
}
}
weather.dart
enum WeatherCondition {
    clear,
    rainy,
    cloudy,
    snowy,
    unknown,
}
enum TemperatureUnits {
    fahrenheit,
    celsius
}
extension TemperatureUnitsX on TemperatureUnits {
    bool get isFahrenheit => this == TemperatureUnits.fahrenheit;
    bool get isCelsius => this == TemperatureUnits.celsius;
}
class Weather extends Equatable {
    final String location;
    final double temperature;
    final WeatherCondition condition;
    const Weather({
        required this.location,
        required this.temperature,
        required this.condition,
    });
    @override
    List < Object ? > get props => [location, temperature, condition];
}
Business Logic Layer
Create bloc files
- Install bloc plugin in your IDE
- Restart your IDE
- Go to File -> New -> Bloc Class
- Enter your bloc name that you want then you see in the lib directory the name bloc is created and it has three different file wather_bloc.dart, weather_event.dart and weather_state
Bloc: The weather_bloc.dart class is a bridge between our UI and the Data layer(weather_repository_impl.dart), In other words, this class will handle all the Events triggered by the User and send the relevant State back to the UI.
We are extending our WeatherBloc class with Bloc which takes two things WeatherEvent and WeatherState. As the name suggests, they handle the applications State and Events respectively.
These two classes are implemented in the weather_event.dart and weather_state.dart respectively.
Weather_bloc.dart
enum WeatherCondition {
    clear,
    rainy,
    cloudy,
    snowy,
    unknown,
}
enum TemperatureUnits {
    fahrenheit,
    celsius
}
extension TemperatureUnitsX on TemperatureUnits {
    bool get isFahrenheit => this == TemperatureUnits.fahrenheit;
    bool get isCelsius => this == TemperatureUnits.celsius;
}
class Weather extends Equatable {
    final String location;
    final double temperature;
    final WeatherCondition condition;
    const Weather({
        required this.location,
        required this.temperature,
        required this.condition,
    });
    @override
    List < Object ? > get props => [location, temperature, condition];
}
_getWeather(String? city) uses our weather repository to try and retrieve a weather object for the given city
Event: weatherEvent.dart
abstract class WeatherEvent extends Equatable {
    const WeatherEvent();
}
class GetWeather extends WeatherEvent {
    final String city;
    const GetWeather({
        required this.city
    });
    @override
    List < Object ? > get props => [];
}- In this class, we define different kinds of events by extending the abstract event class.
- For example, when the user presses the search icon, the WeatherRequest event is triggered.
- Here I’ve also created a final field called city. It’s nothing but a string inputted by the user in the search text field.
- We have to pass it to the event in order to access it in our bloc.
- Now let’s implement weather_state.dart class
State: Weather_state.dart
enum Status {
    loading,
    success,
    failed,
    initial
}
class WeatherState extends Equatable {
    final Status status;
    final Weather ? weather;
    final TemperatureUnits temperatureUnits;
    const WeatherState({
        this.status = Status.initial,
        this.weather,
        this.temperatureUnits = TemperatureUnits.celsius
    });
    WeatherState copyWith({
        Status ? status,
        Weather ? weather,
        TemperatureUnits ? temperatureUnits
    }) {
        return WeatherState(status: status ?? this.status, weather: weather ?? this.weather, temperatureUnits: temperatureUnits ?? this.temperatureUnits);
    }
    @override
    List < Object ? > get props => [status, weather, temperatureUnits];
}
In this class, we define only one state but if you want then you create a abstract class like this abstract class WeatherState {} and extend this class like
class WeatherInitial extends WeatherState {}
class WeatherLoadInprogress extends WeatherState {}
There are four states our weather app can be in:
- Initial before anything loads
- Loading during the API call
- Success if the API call is successful
- Failure if the API call is unsuccessful
The WeatherStatus enum will represent the above.
How To Access bloc?
Trigger an Event:
You need a context bloc and event that you trigger. In this WeatherBloc is our bloc and GetWeather is our event for getting weather and it needs a field city. We input the city dhaka.
context.read().add(GetWeather(City: "texas"));BlocProvider
- BlocProvider widget provides a bloc to its children (i.e Widgets).
- BlocProvider is used as a dependency injection (DI) widget so that a single instance of a bloc can be provided to multiple widgets within a subtree.
- Okay. So now we know what BlocProvider does, where can we put it?
- You put the BlocProvider the root MaterialApp or Every single Widget. Here we provide blocProvider in every widget
Widget build(BuildContext context) {
    return BlocProvider(create: (context) => WeatherBloc(context.read()), child: const WeatherView(), );
}- Now you can access the WeatherBloc
MultiBlocProvider
- Bloc provides us with a MultiBlocProvider widget that takes a List of Bloc and provides it to its children. Let me demonstrate.
MultiBlocProvider(providers: [
    BlocProvider(create: (BuildContext context) => BlocA(), ),
    BlocProvider(create: (BuildContext context) => BlocB(), ),
    BlocProvider(create: (BuildContext context) => BlocC(), ),
], child: ChildA(), )
BlocBuilder
- BlocBuilder is a widget that helps Re-building the UI based on State changes.
- In our case we want our UI to update the state when the user presses the Get Weather button.
- BlocBuilder builds the UI every single time state changes
- So, it’s very necessary to place BlocBuilder around the Widget that we want to rebuild.
- You can also wrap the whole Widget inside the BlocBuilder (i.e around the Scaffold), but it’s not a good way. Because think about the time and processing power that will be consumed when your whole widget tree rebuilds just to update a Text widget inside the tree. So make sure you wrap the BlocBuilder around the widget that needs to be rebuild when the state changes.
BlocBuilder < BlocA, BlocAState > (builder: (context, state) {
    // return widget here based on BlocA's state
})- Only specify the bloc if you wish to provide a bloc that will be scoped to a single widget and isn’t accessible via a parent BlocProvider and the current BuildContext.
- Build When parameter takes the previous bloc state and current bloc state and returns a boolean. If buildWhen returns true, builder will be called with state and the widget will rebuild. If buildWhen returns false, builder will not be called with state and no rebuild will occur. Actually it prevent unexpected build.
BlocBuilder < BlocA, BlocAState > (buildWhen: (previousState, state) {
    // return true/false to determine whether or not
    // to rebuild the widget with state
}, builder: (context, state) {
    // return widget here based on BlocA's state
})
BlocSelector
- Unnecessary builds are prevented if the selected value does not change.
- The selected value must be immutable in order for BlocSelector to accurately determine whether builder should be called again.
BlocSelector < BlocA, BlocAState, SelectedState > (selector: (state) { // return selected state based on the provided state. }, builder: (context, state) { // return widget here based on the selected state. }, )BlocListner
- As the name suggests, this will listen to any state change as BlocBuilder does.
- But instead of building the widget like BlocBuilder, it takes one function, listener, which is called only once per state, not including the initial state.
- It also has a bloc parameter. Only specify the bloc if you wish to provide a bloc that is otherwise not accessible via BlocProvider and the current BuildContext.
- The listenWhen parameter is the same as BlocBuilder’s buildWhen but for Listener.
- The whole idea of BlocListener is – It is not responsible for building/updating the widget like BlocBuilder does.
- It only listens to the state changes and performs some operation. The operation could be (Navigating to other screens when state changes, Showing Snackbar on a particular state, etc).
MultiBlocListener
- MultiBlocListener is a Flutter widget that merges multiple BlocListener widgets into one. MultiBlocListener improves the readability and eliminates the need to nest multiple BlocListeners
MultiBlocListener(listeners: [
    BlocListener < BlocA, BlocAState > (listener: (context, state) {}, ),
    BlocListener < BlocB, BlocBState > (listener: (context, state) {}, ),
    BlocListener < BlocC, BlocCState > (listener: (context, state) {}, ),
], child: ChildA(), )
BlocConsumer:
- Bloc provides a BlocConsumer widget, which combines both BlocListener and BlocBuilder.
- An optional listenWhen and buildWhen can be implemented for more granular control over when the listener and builder are called.
BlocConsumer < BlocA, BlocAState > (listenWhen: (previous, current) {
    // return true/false to determine whether or not
    // to invoke listener with state
}, listener: (context, state) {
    // do stuff here based on BlocA's state
}, buildWhen: (previous, current) {
    // return true/false to determine whether or not
    // to rebuild the widget with state
}, builder: (context, state) {
    // return widget here based on BlocA's state
})
RepositoryProvider:
- It is the same widget as BlocProvider.
- But the main difference is BlocProvider provides a single instance of bloc to its children whereas RepositoryProvider provides repositories to its children.
- It is used as a dependency injection (DI) widget so that a single instance of a repository can be provided to multiple widgets within a subtree.
RepositoryProvider(create: (context) => RepositoryA(), child: ChildA(), );- Retrieve the Repository
// with extensions
context.read();
RepositoryProvider.of(context);
MultiRepositoryProvider:
- MultiRepositoryProvider is a Flutter widget that merges multiple RepositoryProvider widgets into one. MultiRepositoryProvider improves the readability and eliminates the need to nest multiple RepositoryProvider. By using MultiRepositoryProvider we can go from:
MultiRepositoryProvider(providers: [
    RepositoryProvider(create: (context) => RepositoryA(), ),
    RepositoryProvider(create: (context) => RepositoryB(), ),
    RepositoryProvider(create: (context) => RepositoryC(), ),
], child: ChildA(), )
Get the full Project from our Github
Tags : Flutter, Mobile app development, technology
We use cookies to ensure that we give you the best experience on our website. If you continue to use this site we will assume that you are happy with it.AcceptPrivacy policy